Insert Include Pages - Using Code Snippets to Insert Include Pages

FrontPage Includes as they were formally known in previous FrontPage versions are not available via the menus in Expression Web 1.0. In this tutorial we outline how to Insert Include Pages.
Include Pages were not available in Expression Web 1.0, this is because they are technically part of the web bots from FrontPage which are being deprecated within Expression Web. However, FrontPage Includes are a special case - now known as Design Time Includes (DTIs) so Microsoft have now inserted them back into Expression Web 2.0 via the Customize - Command pane. Read more about the Include Pages With the advent of Expression Web 3.0 it is available on the Standard Toolbar. The same applies to Expression Web 4.0, however Microsoft are working on a Custom Toolbar addin.
Why Design Time Includes are good to use
- They Validate fully
- They are visible in disk based webs on your hard drive
- They work with or with out FPSE on the server
- They save you hours of menu maintenance and are good for repeated content in non DWT based webs.
How to access Include Page Properties
We outline how to access Include Page Properties sometimes known as either Author Time Includes or Design Time Includes, in your Expression Web with this workaround. First put forward by Cheryl Wise Microsoft MVP - FrontPage
Insert Include Code into Code Snippets
Firstly select the Include code below and paste to a notepad file then select and copy. (Important)
<!--webbot bot="Include" u-include="../_inc/insert-name.htm" tag="BODY" -->
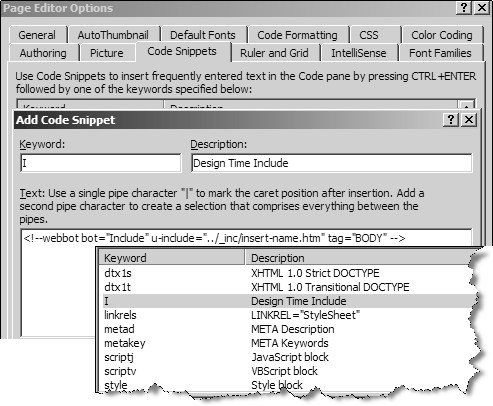
Go to the Tools Menu and select Page Editor Options | Code Snippets Tab. Press Add and insert the Include Code you previously copied by right clicking and pressing Paste in the Text: Pane area. Under the Keyword Pane insert a code word or number in this case we have used ( I ). Under the Description Pane give the snippet a name, here we have called it Design Time Include. Press OK and the Snippet will then be listed amongst your other Code Snippets.
![]() VIEW SCREENSHOT - Code Snippets Tab in Page Editor Options
VIEW SCREENSHOT - Code Snippets Tab in Page Editor Options
Using Code Snippet
In order to use your Code Snippet you MUST be in Code View
Firstly you must position your cursor in the Code View location you wish your Include to appear. If you find this difficult you can do the following.
NOTE: Select Show Split View at the bottom of the page and position your cursor in the bottom half of Split View (Design View) in the location you wish the Include to appear. You will see the cursor is highlighted in the top half of the Split View (Code View). This gives you your cue as to placement of your cursor amongst the x/html. Once the cursor is placed you can access the Code Snippet Include in a variety of ways.
Code View Toolbar
1. Go to Tools | Customize | Toolbars Tab and select Code View and press code. The Code View Toolbar will appear, drag it and dock it under the menus.
![]() VIEW SCREENSHOT - Code View Toolbar
VIEW SCREENSHOT - Code View Toolbar
From the Code View Toolbar you can access the List Code Snippets Icon.
![]() - Fig 1: List Code Snippets Icon
- Fig 1: List Code Snippets Icon
Drag List Code Snippets Icon to Custom Toolbar
2. Use the Customize Dialog box to drag the List Code Snippets Icon onto a Custom Toolbar with your favourite Shortcuts
Use the Edit Menu to access List Code Snippets
3. Go to Edit | IntelliSense | Click List Code Snippets and the Dialog box will appear.
Use keyboard to access Code Snippets List
4. After positioning your cursor simply press Control + Enter on the keyboard and the Code Snippet List will appear, either select the snippet you wish to use by scrolling down or using the keyboard, select the keyword letter or number for the snippet, in this case ( I ) which will highlight the snippet then press Enter or Tab to insert it or you can double click.
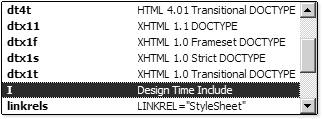 Fig 2: Code Snippet List
Click the Design View section of Split View and the Include path appears.
![]()
Mouse over the Include Page path and you will see the 'Folder in the hand' cursor which denotes that this is an Include. Double click and the Include Page Properties Dialog box will appear.
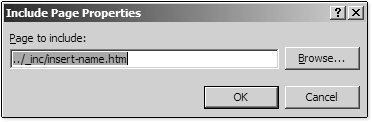 Fig 4: Include Page Properties Dialog Box
Browse to the location of your include file to make sure you have the path correct and press ok. Your Include page will appear.

Cheshire Web Designs - Cheshire website Designs by Any Expression Web Designs
Owner Any Expression Web Designs and Clarke Abstract Art
Copyright © 2006 - 2021 Tina Clarke of Any Expression Web Designs All Rights Reserved
Are you looking for a Web Designer?Web Designs created by Any Expression Web Designs